4. A platform og tagwalls
This article is not finished
Right now we don’t have a model on the index route. We need to pass some messages to our component but so far we haven’t got any messages in our app. Let’s quickly create some dummy content in the index route. Later we’ll change to use ember-data models. Previously we made an {{#each}} list in the posts/template but we didn’t have any model so the list was empty. We should tell the route to return all posts. Edit app/posts/route.js:
import Ember from 'ember';

export default Ember.Route.extend({
	model() {
    return this.store.findAll('post');
	}
});
Add a link to our posts/new route to our navigation in app/posts/template.hbs:
<h1>Rough Tagwall</h1>

<nav>
	{{#link-to 'posts'}}Posts{{/link-to}}
	{{#link-to 'posts.new'}}New post{{/link-to}}
</nav>

{{outlet}}
On this route we’ll show a form to create posts. Let’s return an empty object to hold the title and body attributes we want to create for the post. When the user submits the form, we’ll copy the title and body fields to a real post model and save it.
Edit app/posts/new/route.js:
import Ember from 'ember';

export default Ember.Route.extend({
	model() {
		return Ember.Object.create();
	}
});
The template app/posts/new/template.hbs could look like this:
<h3>New post</h3>
<form {{action 'save' on='submit'}}>
	<label>
		Title<br>
		{{input value=model.title required=true}}
	</label>
	<br>
	<br>
	<label>
		Text<br>
		{{textarea value=model.body}}
	</label>
	<br>
	<button type="submit">Save</button>
</form>
We’ve bound the value of our two inputs to properties on the empty object we used as model. On the <form> element, we catch the default submit event, which triggers when you submit the form (e.g. tap save) and map it to an action of our own called save.
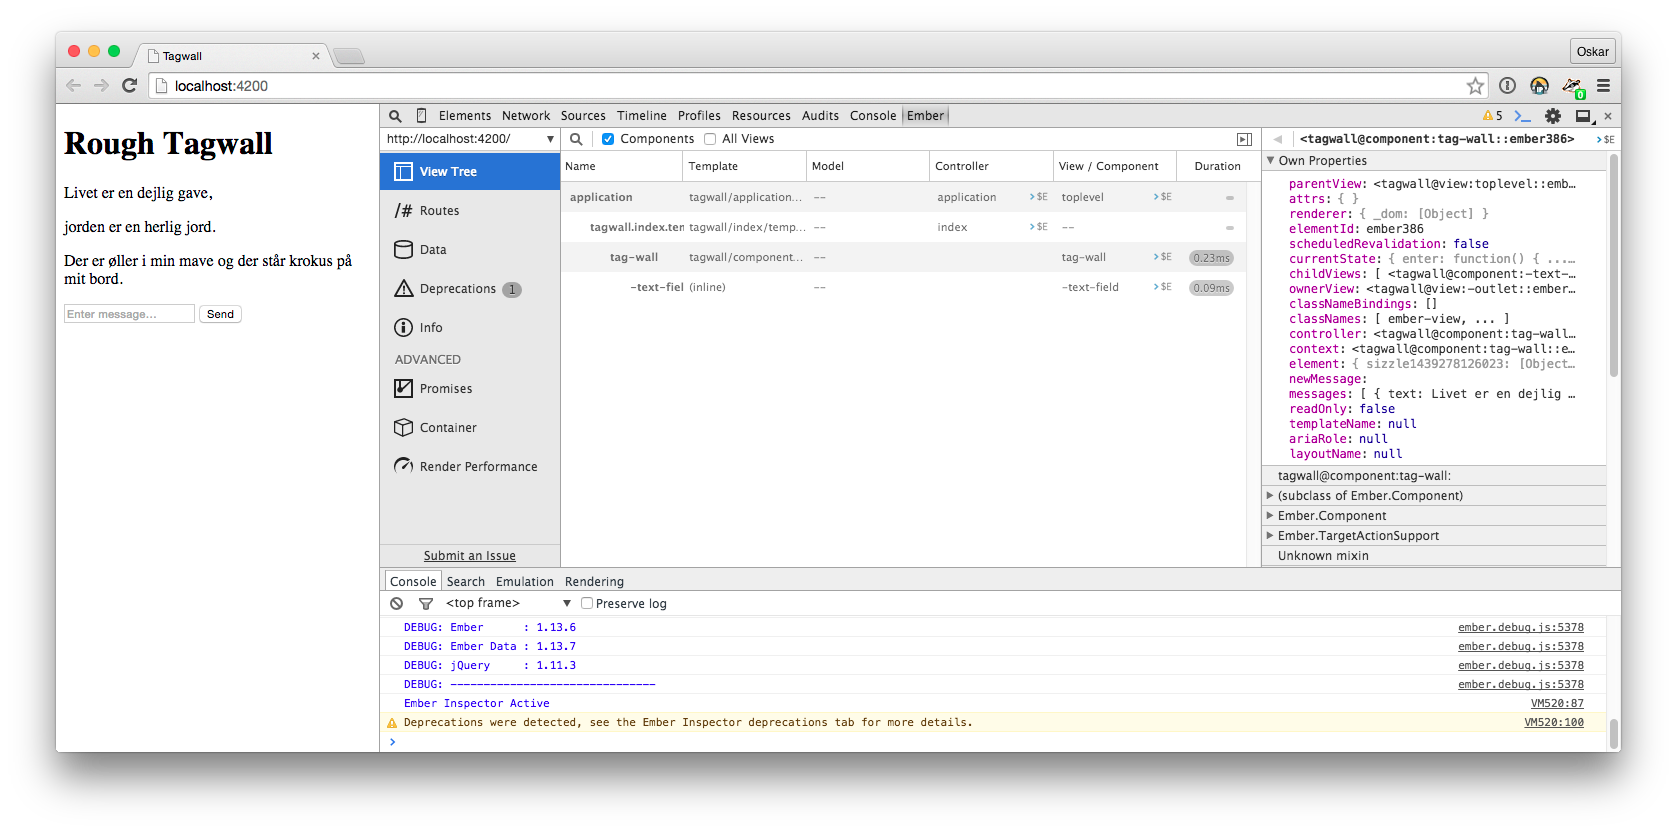
Try to create a post now and tap ‘save’. See the error? No? Then it’s time to try the Ember Inspector browser extension to help debug. Install it now, please. Afterwards open your browser’s developer tools and check the console. It will complain that we didn’t handle the save action. We didn’t. Note the ‘Ember’ tab which provides all sorts of useful information about the current state of our tagwall. It should look something like this:
Editing and deleting posts
We’ll now use the post/edit route to, well, edit our posts. Since edit is a child of the post route, if we don’t define anything else, it will inherit the model from its parent.
Since the post/edit form would probably look almost identical to posts/new we can refactor with a reusable component. Components are like a controller, view and template in one. Extremely powerful. Except they need to be named with at least one hyphen, let’s call ours post-form:
ember g component post-form
TASK: create the edit and delete yourself. It’s almost exactly the same pattern as creating a new post e.g. what we did for posts/new.
If you’re not sure what to do, take a look at the repository, where I’ve saved a version of this blog’s site. You can check out the sourcecode and get some inspiration.
Before anything, we’ll define the routes we will be needing and let Ember-CLI do the heavy work by generating the files we need. As everything will be happening on the same page with our tagwall, we actually don’t need any other routes than the default application and index routes Ember gives us, but we’ll create one anyway to contain the tagwall.
ember g route tagwall
If you open app/router.js, it should look very close to this.
import Ember from 'ember';
import config from './config/environment';

var Router = Ember.Router.extend({
  location: config.locationType
});

Router.map(function() {
  this.route('tagwall');
});

export default Router;
Setting the index route (homepage)
If you open up http://localhost:4200 and check you won’t see. What we want is the posts route to be the homepage. A common approach is to redirect the index route to our own posts route. Let’s do that:
ember g route index
Edit app/index/route.js to this:
import Ember from 'ember';

export default Ember.Route.extend({
	redirect() {
		this.transitionTo('posts');
	}
});
Check your browser. Now it should show you the posts template as homepage.
Posts
Let’s test, open up app/application/template.hbs and fill in some text:
<h1>Rough blog</h1>

<nav>
	{{#link-to 'posts'}}Posts{{/link-to}}
</nav>

{{outlet}}
Remember, the browser will refresh and show the changes on localhost:4200. On the /posts route we want to show all posts and have a link to create a new post. Let’s do that. Edit app/posts/template.hbs:
<h2>Posts</h2>

{{#each model as |post|}}
	<h3>
		{{#link-to 'post' post}}{{post.title}}{{/link-to}}
	</h3>
{{/each}}

{{#unless model}}
	<p>No posts yet.</p>
{{/unless}}

{{outlet}}
OK, a couple of things happening here. We’re iterating through the model, through every iteration the current post is saved into the post variable. We use this post var to show the title. You’ll also note the {{link-to}} helper. We give it two arguments, first the route we want to transition to and second the model we want to use. We also end the template with an unless conditional. It’ll only render if there is no model. The {{outlet}} is where any nested routes would be rendered. For instance, if you visit posts/new it’ll render the posts/new template into the outlet of posts, because it’s its parent.
Showing a post
Let’s add a link to the post titles in our posts template.
{{#each model as |post|}}
	<h3>
		{{#link-to 'post' post}}{{post.title}}{{/link-to}}
	</h3>
{{/each}}
The first argument to the link-to helper is the name of our route and the second is the particular model we want for the route. We have to specify one, because the post route should be a dynamic route. The post route is considered dynamic because it could render any single model. We need to specify that. Open app/router.js and edit the post route like this:
this.route('post', { path: 'post/:post_id' }, function() {
Notice how we pass a second argument to the route function: an object with a path property. We tell Ember that the route contains a dynamic segment and we name it :post_id. That tells Ember to use the ID of the post to identify the model. That means if you go to http://localhost:4000/post/666it'll attempt to render a post with an ID of666. Alright, let's fill out the post template inapp/post/template.hbs`.
<article>
<h1>{{model.title}}</h1>
<p>{{model.body}}</p>
</article>
<p>{{#link-to 'posts'}}← back{{/link-to}}</p>
Create some posts, see how they appear in the list. Now you can tap post links and see their detail page, which should look something like this: